Top 10 Winter Home Maintenance Tips to Save on Unexpected Expenses

Top 10 Winter Home Maintenance Tips to Save on Unexpected Expenses

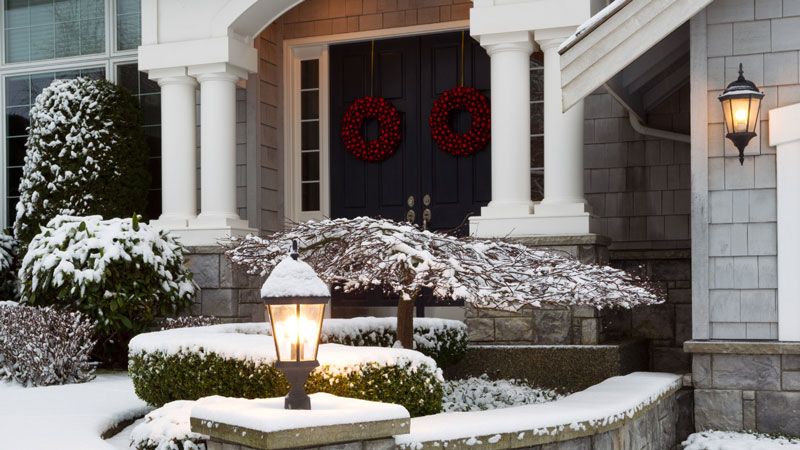
Winter, with its icy winds and freezing temperatures, often brings unexpected home maintenance issues. However, if you are prepared, it is possible to avoid these unwelcome surprises and save on potentially budget-busting expenses. Here are the top 10 winter home maintenance tips to help you keep your home in great shape and prevent unnecessary costs.

  1. Insulate Pipes: Freezing temperatures can cause pipes to burst, leading to costly water damage. Insulating the pipes reduces this risk, and a home warranty can provide coverage for such unexpected plumbing issues.
  2. Clean Gutters: Overflowing gutters due to ice dams can damage your roof and walls. Regular cleaning of gutters can prevent this, and a home warranty can cover potential damages.
  3. Seal Windows and Doors: Drafts from windows and doors increase heating costs. Sealing these gaps can enhance energy efficiency and reduce heating bills.
  4. Inspect the Roof: Snow accumulation can lead to roof leaks. Regular roof inspections can detect potential issues early, saving you from hefty repair costs.
  5. Service Your Heating System: Regular servicing of the heating system ensures it works efficiently through the winter, reducing energy bills. A home warranty can cover sudden breakdowns.
  6. Check Smoke Detectors: With the increased use of heaters and fireplaces in winter, ensuring that smoke detectors are working is crucial for safety.
  7. Prepare Your Fireplace: Cleaning and inspecting the fireplace before its heavy winter use can prevent chimney fires and carbon monoxide poisoning.
  8. Trim Tree Branches: Heavy snowfall can cause tree branches to fall, damaging your property. Trimming branches close to your house can prevent this.
  9. Protect Outdoor Furniture: Covering outdoor furniture can protect it from winter elements, prolonging its lifespan.
  10. Stock Up on Winter Essentials: Having items like salt, shovels, and emergency supplies on hand before a storm hits can save you from last-minute, pricey purchases.

Remember, winter home maintenance is not just about immediate cost savings. It’s about preventing bigger, more expensive problems down the line. And while these tips can help you prepare for winter, having a home warranty provides an added layer of protection. Home warranties cover major systems and appliances in your home, providing peace of mind and preventing unexpected repair or replacement costs. So, don’t wait until a real expense comes up – consider investing in a home warranty today.

These are some of the ways to maintain your home this winter. Don’t let winter maintenance catch you off guard. Stay prepared, stay safe, and most importantly, stay warm!

Does a Home Warranty/Residential Service Contract Cover Plumbing?

Maintaining a home is expensive, particularly today. Homeowners need every advantage they can get, which makes purchasing a home warranty/residential service contract a smart decision. These agreements can help cover major appliances and necessities like your water heater. But what about your plumbing system? Does a home warranty/residential service contract cover plumbing?

The answer is “yes”, but there are a few caveats to understand. We’ll walk you through them in this blog post.

The Need for Plumbing Coverage

Why worry about your plumbing system? For many homeowners, out of sight means out of mind. At least until there’s a clog that backs up the sewage or a leak that damages your sheetrock. Then you’ll need to call a plumber and shell out cash for a repair.

In many cases, just getting a plumber out to your home costs $100, not counting the cost of the repair, which can easily cost hundreds of dollars. With serious issues, you could be looking at a repair cost in the thousands of dollars.

Home warranties help offset those costs. You’ll pay a set amount for your warranty, and it covers the cost of repairs and replacements. So, if your water heater fails, you don’t have to worry about shelling out $2,000 or $3,000.

Home Warranties and Plumbing Coverage

First, if your home warranty/residential service contract company does cover plumbing, chances are good that coverage is not part of the standard package. You’ll need to choose it from the list of optional items. Other types of optional coverage you might want to consider include:

  • Garage door opener
  • Secondary AC units
  • Septic systems
  • Secondary/garage refrigerator
  • Well pump
  • Pool pump/spa equipment

Understanding Home Warranty/Residential Service Contract Plumbing Coverage

Now let’s explore the typical coverage offered on plumbing. Understanding this can make a major difference in your peace of mind and stress level if an emergency occurs.

What’s Covered?

In most cases, a home warranty/residential service contract company will cover the majority of your interior plumbing system. You’ll need to check your policy or speak with your home warranty/residential service contract company to determine the exact covered items because they do vary.

This is important protection because your homeowner’s policy will not cover these items. It’s designed to cover the structure of your home in the event of an emergency or natural disaster, like a fire. Your insurance company may not even cover the damage caused by a burst pipe, which can inundate your walls, floor, and ceiling with water leading to mold growth, discoloration, rot, and the need for replacement.

What’s Not Covered

While your home warranty/residential service contract will cover many plumbing-related issues, some things are excluded. For instance, most home warranties/residential service contracts exclude all piping that’s outside your home. That includes water supply lines running to your home, as well as sewer lines running away from your home. Note that septic lines and tanks don’t fall under this heading. They’re usually covered as separate line items on your home warranty/residential service contract policy.

In Conclusion

Do home warranties/residential service contracts cover plumbing? Yes, but this coverage is often optional. Double-check your warranty to ensure that you’ve purchased plumbing coverage and verify which items are covered and which are excluded.

Don’t have a home warranty/residential service contract yet? At Trinity Home Advisors, we give homeowners just like you the peace of mind you deserve. Get in touch with us today to learn more about how we can protect your home and save you money and sanity.


Source:

https://www.trinityhomeadvisors.com/services/

https://www.hwahomewarranty.com/learning-center/homeowners/does-home-warranty-cover-plumbing#:~:text=Thankfully%2C%20a%20home%20warranty%20does,and%20lead%20to%20other%20issues.

Is Your Home Appliance Ready for Fall? A Handy Checklist

As the leaves start to change color and the air becomes crisp, we know fall is upon us. It’s a beautiful time, but it’s also the perfect moment to ensure your home appliances are ready for the chillier months ahead. So let’s dive into a helpful checklist to ensure your home is snug, safe, and energy-efficient.

Your Fall Home Maintenance Checklist

  1. Check Smoke Detectors: You should check your smoke detectors twice a year – fall and spring cleans are the perfect time to do this. Ensure they’re functioning properly and replace batteries if needed.
  2. Replace Air Filters And Check Your HVAC System: Your HVAC system needs a clean, pleated paper air filter to function optimally. Depending on usage, these should be replaced monthly or quarterly (every 3 months). While doing so, give your HVAC a thorough check. You’ll want to fix any issues now rather than when the heat goes out in the middle of winter!
  3. Care for Outdoor Spigots: Before the first freeze hits, protect your outdoor spigots with freeze protectors. These handy devices can prevent frozen pipes and potential water damage. Also, do one last check for leaks before you put everything away for the winter.
  4. Clean the Garbage Disposal: With all the hearty fall cooking, your disposal might see some extra action. Keep it running smoothly by giving it a good clean.
  5. Seal Air Leaks: Keep the warm air in and the cold air out by sealing any air leaks around windows and doors. This simple step can save energy and keep your home cozy.
  6. Clean Gutters and Downspouts: Falling leaves can clog gutters and downspouts. Cleaning them out can prevent water damage and keep them functioning properly.
  7. Check Your Roof: Checking your roof should be another bi-annual task. Before winter weather hits, give your roof a once-over for any potential issues or repairs needed.

Remember, a well-maintained home is not just about comfort, it’s about safety too. Taking these steps will ensure a cozy, worry-free fall season. As we bid farewell to summer and welcome the beautiful autumn season, let’s ensure our homes are ready too.

If you do encounter any issues that need fixing while going through your checklist, don’t hesitate to call in a professional. With a home warranty, you can save money on repairs and make the process much, much easier! Contact Trinity Home Advisors today to set up a warranty, and settle in for a stress-free fall!

Dishwasher Cleaning & Maintenance: 5 Sparkling Tips for a Sparkling Machine

The dishwasher is the unsung hero of the kitchen. So many of us rely on these machines to make our lives easier, but are you doing enough to take care of it in return?

If your dishes haven’t been quite as clean as they could be, it might be time to give the dishwasher a wash of its own. With these 5 bright and shiny tips, you’ll be able to keep your dishwasher running smoothly and your dishes sparkling clean.

5 Dishwasher Cleaning & Maintenance Tips

  1. Regularly Clean the Filter: Your dishwasher filter traps food particles during the wash cycle. To keep your dishwasher running efficiently, clean the filter regularly by rinsing it under warm water and scrubbing gently with a soft brush.
  2. Inspect the Spray Arm: The spray arm is key to your dishwasher’s cleaning power. Check it regularly for clogs or food particles and clean it as necessary.
  3. Use a Dishwasher Cleaner: Every few months, run your dishwasher empty with a specially formulated dishwasher cleaner. This can help remove accumulated grease and limescale.

    TIP: Don’t want to spend money on a cleaner? A mug of white vinegar on the top shelf of your dishwasher will clean things up, too!

  4. Check the Door Seal: A leaky dishwasher can be due to a damaged door seal. Inspect the seal for cracks or damage and replace it if necessary.
  5. Don’t Overuse Detergent: More isn’t always better when it comes to dishwasher detergent. Using too much can leave residue on your dishes and inside the dishwasher. Follow the manufacturer’s recommended amount.

Remember, preventative care is the best way to avoid costly repairs down the line. Regular maintenance not only extends the life of your dishwasher but also improves its performance, ensuring you’ll always have spotlessly clean dishes.

If you do encounter any issues that seem beyond your skills, don’t hesitate to call in a professional. With a home warranty, you can save money on repairs and make the process much, much easier! Contact Trinity Home Advisors today to set up a warranty to keep your dishwasher – and your other appliances – in tip-top shape!

Keep Your Dryer Vent Clear With 6 Easy Steps

When was the last time you took a look at your dryer vent? If the answer is “I don’t remember,” you’re not alone. This often-overlooked appliance is tucked away out of sight, but that doesn’t lessen the amount of TLC it needs to keep your home running smoothly and safely.

Cleaning out your dryer vent will ensure that your dryer runs more efficiently – that means no more repeat cycles – and it presents any potential fire hazards from caught lint. So here’s everything you need to clean up your vent today! 

Step 1: Gather Your Tools

For this task, you’ll need a vacuum with a long hose attachment, a dryer vent brush kit, screwdrivers (just in case your vent is screwed in place), and some gloves to keep your hands clean.

Step 2: Unplug and Disconnect

Always unplug your dryer before starting any maintenance work. Once you’ve done that, pull the dryer away from the wall so you can access the vent. Disconnect the vent duct from the dryer.

Step 3: Vacuum the Dryer Vent

Use your vacuum to clean out both ends of the vent. Just attach your long hose and stick it right in. You’ll be surprised at the amount of lint that can accumulate in there.

Step 4: Brush Out the Vent

Use your dryer vent brush to scrub out the vent. This will help get rid of any stubborn lint that your vacuum couldn’t reach.

Step 5: Reattach the Duct

Once you’re satisfied with the cleanliness of your vent, reattach the duct to your dryer. Make sure it’s secure before moving on.

Step 6: Test Run

Plug your dryer back in and do a quick test run with some old towels or rags. Check the external vent while the dryer is running to make sure air is flowing freely.

Congratulations! You’ve successfully cleaned your dryer vent. By doing this simple maintenance task, you’ve not only improved the efficiency of your dryer, but you’ve also made your home safer.

Remember, it’s recommended to clean your dryer vent at least once a year. And, if your dryer still isn’t quite doing its job, it might be time to call a professional. With a home warranty, you can save money on repairs and make the process much, much easier! Contact Trinity Home Advisors today to set up a warranty for your dryer, washer, heater, and other appliances to keep your home in tip-top shape.

Warm Up to These 7 Helpful Hints About Your Water Heater

We all love our water heaters, but often we don’t think about them much until we’re faced with an ice-cold shower. Rather than waiting for your next surprise wake-up call, take care of your water heater in advance! Let’s turn up the heat with some helpful hints on understanding and maintaining your water heater, so you can keep it in tip-top shape!

Remember, safety first! Always turn off the power supply before inspecting your water heater, especially when dealing with gas or electricity.

7 Hot Tips for Your Water Heater

  1. Know Your Heater Type: There are two main types of water heaters—tankless and storage tank. Just knowing which type you have can help you anticipate potential issues and how best to maintain it without any frantic Googling in a crisis.
  2. Check the Thermostat: Ensure your water heater’s thermostat is set to an optimal temperature. The Department of Energy recommends a setting of 120 degrees Fahrenheit to save energy and prevent scalding.
  3. Drain and Flush Regularly: Did you know that water heaters can get sediment buildup? This can affect its efficiency and shorten its lifespan.Once a year, you should drain and flush out your water heater to keep it running smoothly.
  4. Inspect the Pressure Relief Valve: This safety feature releases excess pressure from the tank to prevent it from exploding. Be sure to test it regularly to ensure it’s working correctly.
  5. Insulate Your Tank: Older tank models sometimes need a little help with insulation. By adding insulation, you can reduce heat loss, which can improve efficiency and save on your energy costs.
  6. Listen for Noises: Unusual sounds from your water heater could signal a problem. Banging or rumbling noises might indicate sediment buildup, while a high-pitched whine could mean a faulty valve. If anything sounds off, it’s worth getting checked out.
  7. Plan for Replacement: Most water heaters last between 8-12 years. By keeping track of your water heater’s age, you can plan for its replacement (and avoid an unpleasantly icy shower.)

By understanding your water heater and performing regular maintenance, you can ensure its longevity and efficiency. Remember, if you encounter any issues that seem out of your depth, don’t hesitate to call in a professional.

If your water heater is covered by a warranty, it could mean saving a lot of money on repairs and replacements! Contact Trinity Home Advisors today to get coverage for your water heater (and other appliances!) to give you peace of mind even after a freezing shower.

What To Check When Your Freezer’s Not Working: A Handy Guide

Have you found yourself in a bit of a cold spot because your trusty freezer isn’t working as it should? Don’t call the repair man just yet; here are some simple checks you can do yourself. Sometimes the solution is much easier than you think!

Remember, safety first! Before you start your inspection, always unplug your freezer.

Step-by-Step Freezer Checklist

  1. Check the Power Supply: You’d be surprised how often something so simple is the culprit. Make sure your freezer is properly plugged in, and check to see that the outlet is functioning properly by plugging another device into the same outlet.
  2. Inspect the Freezer’s Thermostat: Your freezer’s temperature is controlled by an internal thermostat. If it’s set too high, your freezer might not be cold enough. Try adjusting the thermostat to a lower setting and see if that helps.
  3. Examine the Door Seal: A worn-out or damaged door seal can allow cold air to escape, causing your freezer to work overtime–or worse, not keep cold at all. Inspect the seal around the edge of your freezer door for any signs of wear and tear.
  4. Look for Frost Build-up: Sometimes, too much frost can interfere with the freezer’s cooling process. Defrosting your freezer might solve the problem.
  5. Check the Coils: Over time, the condenser coils on the back of your freezer can accumulate dust and dirt, making it harder for your freezer to cool down. Luckily, it’s an easy fix– just clean these coils with a coil brush or vacuum.
  6. Listen for the Motor: If your freezer is on but not cooling, the motor might be the issue. Listen for any unusual sounds. You should hear a gentle hum from it. If it’s making strange sounds, or if it’s completely silent, it might be time to call a professional.
  7. Check the Evaporator Fan: The evaporator fan circulates cold air inside the freezer. If it’s not working properly, your freezer won’t cool effectively. For this fix, you’re better off calling a professional.

Conclusion

It’s always frustrating when our appliances aren’t working as they should, but with a little patience and some handy know-how, we can often find the simplest solution for a minor problem. But, if your freezer is still acting up after your checks, or if you’re in doubt about what you can fix, don’t hesitate to call in the experts.

Trinity Home Advisors is here to take care of all your home woes. With our warranty plans, we offer round-the-clock care for all your home appliance and system needs. Take a look at our products and get covered today!

8 Simple Steps To Keep Your Garbage Disposal Clean and Fresh

A garbage disposal is a convenience many of us take for granted…until it stops working. If you’ve noticed your garbage disposal isn’t working quite as well as it should, or if you’ve got an odor problem from it, it may be time for a little TLC. Like all appliances, your garbage disposal requires regular maintenance to keep it running smoothly; a little care can even increase its lifespan before needing a replacement.

Luckily, maintenance for garbage disposals is pretty easy! We’ll walk you through eight simple steps to properly clean and maintain your garbage disposal, ensuring its longevity and efficiency. Let’s dive in!

Step 1: Safety First: Before you begin any maintenance work, make sure to turn off the power to your garbage disposal. Your disposal should have a plug dedicated to it under the sink. Unplug the unit before you get to work to avoid any unfortunate accidents.

Step 2: Remove Unwanted Debris: Some things just don’t belong in your disposal, like bones, eggshells, peelings, and other things too big for the drain. And, on occasion, glass or utensils can find their way down the drain, too. If you’ve found a blockage, start by clearing out any big items with a pair of tongs or pliers.

DO NOT put your hands down the disposal, even when it’s unplugged. 

Step 3: Check for Clogs: If you’ve noticed that the water is draining slowly or not at all, it could be a sign of a clog. You can use a chemical drain cleaner to clear it. Alternately, insert a plunger over the drain opening and give it a few forceful plunges to dislodge any debris.

If the clog persists, you may need to call a professional plumber for assistance. If you’re not having any issues with clogs, you can skip right to step 4.

Step 4: Scrub Away Buildup: To remove any stubborn grime or buildup, create a mixture of equal parts baking soda and vinegar. Pour it down the drain and allow it to soak for about half an hour. Then, flush the drain with hot water–either from the sink or boiled on the stove or kettle.

The chemical reaction between the baking soda and vinegar will help break down any residue, leaving your disposal clean and free from unpleasant odors.

Step 5: Brush the Blades Using an old toothbrush or a small cleaning brush, gently scrub the rubber flaps and the underside of the disposal’s splash guard. This will help remove any trapped food particles or residue that can cause odors and affect the efficiency of your appliance.

Step 7: Grind Ice Cubes Grinding a handful of ice cubes in your disposal helps to sharpen the blades and remove any remaining buildup. Simply drop the ice cubes into the disposal and turn it on. The ice will break down into small particles, effectively cleaning the blades and improving the overall performance.

Be careful not to use too much, though, or you risk a drain. Just a few will do the trick!

Step 3: Freshen Things Up with Citrus: Once your disposal is cleared out and plugged back in, cut a lemon or lime into small chunks and toss them into the disposal. Run cold water and turn on the unit, allowing the citrus to break down and naturally deodorize the disposal with a fresh, clean scent.

Step 8: Rinse with Water To finish the cleaning process, run cold water for a few minutes to flush out any remaining debris. This will ensure that your garbage disposal is clean, fresh, and ready to tackle the next load of kitchen waste.

By following these simple steps regularly, you can keep your garbage disposal running smoothly and eliminate any unpleasant odors. Remember, proper maintenance not only extends the lifespan of your appliance but also ensures a cleaner and more efficient kitchen!

If there’s a clog or other issue that can’t be fixed with the steps above, though, don’t hesitate to call a professional! With a warranty from Trinity Home Advisors, you’ll have round-the-clock care for all your home appliance and system needs – including your garbage disposal! Take a look at our products and get covered today!

Why Home Warranties are Smarter Than Home Service Websites

Why Home Warranties are Smarter Than Home Service Websites

At times, it can be difficult to find help to service your home systems and appliances.

You may not always have the connections available to choose a high-quality service or handyman.

That’s where home service websites supposedly come in.

Home service websites work as business directories that offer visitors reviews and quotes of repairmen in their area. This business works to try and offer individuals an easier way to shop for repairs or renovations by comparison.

How exactly do these websites work, though, and how much can we trust them?

A Membership for Mediocre Mending

Some of these websites require a membership to reap the benefits. This means even if you don’t hire anybody at all, you’re still paying a monthly subscription for it. This can cost users a whole lot of money for a whole lot of nothing.

What’s more, only members of these sites can make reports on the companies they’ve hired. So, unless you’re able to come out of pocket for these pricey services, you’re not able to leave your two cents offering a differing opinion.

Paid Ratings

Home service sites offer some certified businesses that they deem as the top contenders for home repairs. This doesn’t always mean that they are great at their jobs, however.

Many of these certified companies have paid to be advertised as the “best of the best.”

As many of us are aware, money doesn’t always buy happiness. A company that simply pays for a great rating might lead individuals to believe that they haven’t necessarily earned that badge of honor.

It may be difficult for someone to trust that these ratings are unbiased if the site has been paid to convince people to choose them first.

Quotes from Affiliates

One of the final steps in purchasing a service from one of these websites is entering your information to receive a quote from various companies. This may sound familiar to you if you’ve ever tried shopping for insurance.

You find some companies that promise you the best quality of service, enter your information, and begin asking for mass quotes from all sorts of companies. This usually means you need to confirm that you are ok with the site sending this information to their affiliates.

Once you check that box, you ultimately make yourself a marketing target for any and every service that paid its way into that site’s advertising. This comes in various forms, including email, texts, calls, and more.

A Better Way – Home Warranties

An alternative to looking for help and hoping you can afford it every time an appliance or home system breaks in your home is a home warranty.

Easy and affordable, home warranties are where the stress ends in the search for repairs.

Why put yourself on the receiving end of aggravating calls and spam emails when you can have all your repairs handled by a company you trust and is easy to work with?

In most cases, your standard appliances, plumbing system, and even your doorbell can be repaired after a simple phone call. The best part? There is no haggling or false advertising involved.

Home Appliances That Increase Your Power Bill When You’re Not Using Them

Home Appliances That Increase Your Power Bill When You’re Not Using Them

High energy bills got you down? Or just thinking about ways to trim your budget?

Did you know that some home appliances contribute to your power bill – EVEN when you’re not using them?

It’s no surprise that appliances use a significant amount of power to do their jobs. What we might take for granted, however, is that some appliances still use power when we’re not even thinking about them.

Meet Standby Power

Standby power is used by our appliances that have remote capabilities. They stay on so they can begin working when they receive a signal.

More and more appliances come with this technology.

This is what makes it possible to begin washing cycles from our smartphones or put our coffee makers on a timed schedule.

While standby power is minimal, so many devices and appliances at once can add up when we get our monthly bills.

Here are just a few appliances that can noticeably increase your power bill even when you’re not using them.

Appliances with Digital Displays

Appliances that have tiny digital displays will consistently use power just to show you the time. Microwaves and coffee makers are just a couple examples of appliances that use power when you’re not warming up food or a morning pick-me-up.

Many have clocks that will tell the time from their bright LEDs. Some can be started with a push of a button from a remote or fob, which means it stays on so it can communicate with other devices.

Washers & Dryers

Our cleaning appliances understandably use quite a bit of power while in use. However, these new technologically advanced appliances come with a few energy-sucking pitfalls.

Some newer washers and dryer models are equipped with soft-touch keypads, which fall under the stand-by umbrella. They are ready to receive a touch signal at any time to indicate that it’s time to work.

Some even come with network capabilities that allow you to remotely begin wash or dry cycles.

Air Conditioner & Electric Furnace

Air conditioners and furnaces are easily some of the biggest energy vampires. People living in harsh climates appreciate the relief of cooler or warmer air once they enter their homes.

It can be easy to forget how much this luxury costs us until we receive the energy bill!

These appliances use up an incredible 3,000 to 13,000 watts of electricity on average per hour. When you forget to turn them off before you leave the house, they could be constantly running. When the sun is at its highest during the day, the AC fights for its life to keep your house cool.

Tips for Decreasing Your Power Bill

The answer for curtailing your excessive power costs due to idle appliances may be obvious.

Tip #1 – Unplugging or otherwise cutting the power to these appliances when they’re not being used is a great place to start.

Tip #2 – For air conditioners and furnaces, you can shut the systems off when nobody is home to use them. During other times of the day, it helps to close off unoccupied areas of the house and raise the temperature accordingly. 

Tip #3 – Idle power usage adds up. Your wallet will thank you for paying attention to the little things that take up power for seemingly no reason at all.

One Last Time for Protecting Your Budget

Managing your home’s electricity usage is a smart way to keep an eye on your budget.

But an even better way is having an easy, affordable home warranty. Home warranties protect you from unexpected repair and replacement costs from your home’s major systems ranging from kitchen appliances to central air conditioning and even pool equipment if you choose. Don’t let a broken appliance ruin your hard work on your budget. Get a free quote on a home warranty today!